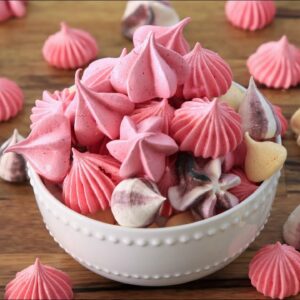
Meringue kisses Recipe | How to Make Meringue Cookies
Learn how to make the best meringue kisses! They are crispy, sweet and they melt in your mouth. These beautiful and colorful meringue cookies are perfect for birthday parties, for holidays, valentine’s day, as a tread or just as a pretty candy that your family and friends will love!
Full written and printable recipe + tips: https://www.thecookingfoodie.com/recipe/Meringue-kisses-Recipe–How-to-Make-Meringue-Cookies
Visit my online shop: https://bit.ly/TCFShop and browse my baking supplies and kitchen tools for all of your baking needs.
*Every purchase you make supports my content creation.
More Recipes you may like:
Pavlova: https://www.youtube.com/watch?v=ZSW3BJi-1jI
Butter Cookies: https://www.youtube.com/watch?v=dzm_QDCqm2U
Almond Cookies: https://www.youtube.com/watch?v=ibwfWgbGVcw
Thumbprint Cookies: https://www.youtube.com/watch?v=JuWK32IX2zc
Chocolate Butter Cookies: https://www.youtube.com/watch?v=nsCcMq_0tY8
FOLLOW ME:
Shop: https://shop.thecookingfoodie.com/
Instagram: https://www.instagram.com/thecookingfoodie/
Facebook: https://www.facebook.com/thecookingfoodie
Website:
Makes about 70-80 cookies
Ingredients:
3 Large egg whites (100g)
1 cup (200g) Castor sugar
Pinch Salt
1/4 teaspoon Cream of tartar (optional)
Gel food coloring (optional)
1 teaspoon Vanilla extract
Directions:
1. Preheat oven to 200°F (100°C), line one or two baking sheets with parchment paper. Set aside.
2. Place the egg whites in a large, clean bowl or a bowl of a stand mixer. Add a pinch of salt and cream of tartar (optional). Beat egg whites until foamy, start by beating on low then increase to high speed, when the mixture is foamy, add the sugar very slowly one teaspoon at a time while continuing to beat.
3. Once all the sugar has been added, continue whisking on high speed and whisk until the meringue is glossy and very stiff.
4. Stir in vanilla extract or other flavoring (see recipe notes). At this stage you can add gel food coloring if desired.
5. Transfer the meringue to a piping bag fitted with a tip/nozzle of your choice. Or just cut the end of the piping bag and pipe without a tip. If you wish you can color your kisses by adding food coloring gel strips inside your pastry bag before filling (see the video).
6. Pipe the kisses onto the prepared trays. Squeeze lightly on the piping bag slowly pulling up before quickly lifting off to create the tip.
7. Place the tray on the center rack and bake for about an hour, then turn the oven off and keep closed for an additional 1-2 hours.
Equipment I used in this video:
Piping Bags: https://shop.thecookingfoodie.com/collections/cooking-tools/products/20-pieces-disposable-piping-bags
Piping Tips: https://shop.thecookingfoodie.com/collections/all-products/products/42-piece-piping-tip-decorating-set
If you like my videos, please subscribe to my channel for new cooking videos: https://www.youtube.com/c/thecookingfoodie?sub_confirmation=1
Recipe Video:

